Well, I am so glad you all liked the
tutorial on hand tinting an engraving! What an overwhelming response! Thank you to everyone who left such lovely comments and to those who emailed me for more info!
I was so inspired by all your positive feedback that I'd thought I'd play around with the idea some more. Here is another pic from the Graphic Fairy -- which is fast becoming a daily addiction to check :) Pretty yellowed paper, but gorgeous mermaid! Love the tail on her and that wistful pose.

OK... so here is it cleaned up and tinted. You can see the tips for doing this on the prior post,
"Hand Tinting an Engraving -- Marie Antoinette in Color". I used a lot of colored chalk on this one for a softer look. Chalk works really well to introduce texture when you have large blank areas of paper to cover. She also has that trademark rouge I give all my engraved women.

Next, I thought it would be fun to scan this back into the computer and see what it would look like converted back into a black and white image. This is what it would have looked like had it been printed in a newspaper and then left to age 20 years. Now it's vintage :) For those who don't know, I adore hand tinting and since I don't have a color printer (just this 20 year old cranky doorstop that reluctantly spits out black ink invoices) I probably spend more time than most perfecting hand tinting since if I want it in color, I have to colorize it :) I do have access to a scanner though, so just had to try this.
Oh, it is just lovely!!! Really rich depth of tone. Tail could have some deeper shadows, but all in all quite worthy of being an illustration to a children's story.
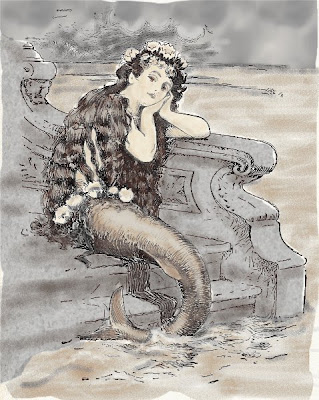
Well, that looked pretty cool, but what if a used some of those fancy filters that come with your computer's graphic program. You know, the ones that are fun to play with but you never really use? This is what it would look like in thick, creamy oil pastels. Oo la la!!! That is just amazingly beautiful! Barely looks anything like the original. Scroll up to the top yellow original holding this image in your mind to see how much the image has evolved.

Well, thank you so much everybody for being my inspiration to continue playing with this!
Now, I have a question for you. This further exploration has turned out so well, do you think I should maybe try to make some notecards or postcards from these images? Do you think there would be any interest?
And if I did, since I don't really do any printing, how would you turn an image like this into a postcard? The only thing I can think of is printing the image out at a copyshop and then appliquéing it onto the front of a blank card so it would be an artcard, but lots of artists make postcards so there must be a better way out there. I would love any advice on this.
In other news, school starts for my two little ones in just a week, so I can now declare my blog break officially over :) Soon they will be off to school with their little backpacks and lunch boxes. My youngest is off to kindergarten this year and it will be strange not to have him at home, but this is going to be such an exciting year for him! My eldest loves school and can't wait to show his little brother the ropes. What good brothers they are!


 crafting little holiday gifts for my blogger friends (not going to show you these since it ruins the surprise), and finishing last minute things for gallery winter deliveries.
 After being literally snowed in for the 10 days before Christmas, our house looks and feels like a trans-Pacific plane after 16 hours of flight (if you've been on one of those - you know what I mean). So the house needs a really good top to bottom cleaning too. Here's what our car looked like for those 10 days, although the gap between top and bottom did eventually close leaving just a rounded mound. I lived in fear that if the mythical snowplow ever did arrive (which it never did on our street) that they would accidentally run into it:
 I am SO far behind on everything that I think I'll still be catching up in February! I'm also having to go in for some frightening medical tests and that's putting me even more behind :( For those of you placing orders, it's taking me an extra day or two for processing this month. Thank you so much for your understanding.
  I hope everyone had a lovely holiday season and that 2009 is starting off just awesomely for you!!


 Posts
Posts

