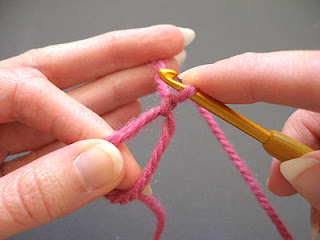
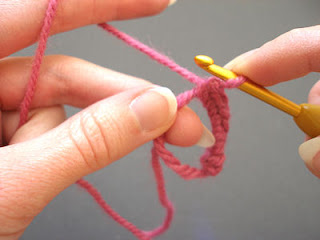
Hiya all! Well, the weather here is just DIVINE. Perfect Spring weather with dappled sunlight, flowers, singing birds .. the works. It's inspired me to sit in my sun-drenched studio most mornings with an iced mocha and good music and write up patterns for some of the designs I've been working on this winter.
One thing I really wanted was an easy, quick coffee cozy pattern. I wanted something I could whip up for last-minute gifts (the coffee cup itself stuffed with tea/chocolate espresso beans/candy), but that was plain enough to work for men as well as women, without losing that handcrafted touch or being too boring. I worked on a crochet one for a while, but crochet just can't achieve the same reliable stretch as ribbing in knitting. I'm writing up what I think is the perfect pattern for my needs now, but how I did hate that gap/bump on the cast-on row (from joining your yarn when working in the round). I went searching for a simple seamless join. And I found this one! "Joining in the round" by Nancy Wynn.
Great tutorial, clear instructions, and nice big needles so you can see what's going on! I didn't want to embed the video, so you'll need to follow the link, but if you struggle with getting a nice-looking edge on your cast-on row, I recommend you give this a look. She's got a bunch of other great videos on her site .. all the knitty basics for learning and expanding your knitting skills!
I've also been busy planting flowers, mulching, and getting the garden in order. The photo is of my new violas .... so pretty all in a row. I do wish they weren't so popular with the slugs though!
Coffee cozy pattern (it's a free one) coming soon!!
Showing posts with label tutorial - stitches. Show all posts
Showing posts with label tutorial - stitches. Show all posts
Friday, May 03, 2013
Sunday, March 06, 2011
How to Do Basic Beaded Crochet Lace
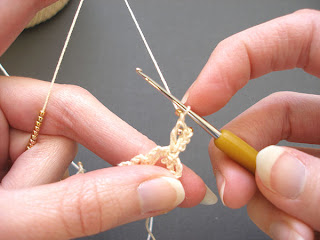
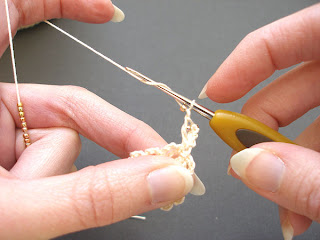
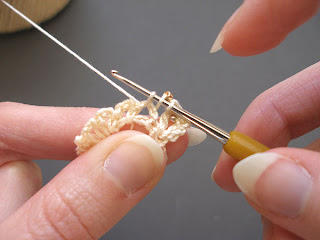
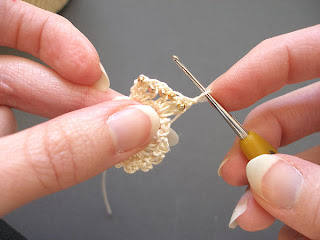
With beaded lace patterns I'm often asked, "How do you get the beads on there?" or "How do you do beaded crochet?" or "How do you bring up a bead (abbreviated in crochet patterns as 'BUB') to crochet it?". Here's an illustrated tutorial on how you do it (Note: Beaded lace is tiny - Click on any photo to ENLARGE IT):
1)Pre-string all beads needed for the pattern on your yarn/crochet thread. I use a big eye collapsible needle (available in beading stores) to string my beads. Not all beads in a batch may fit over the needle and onto the yarn - discard those that don't slide easily on.
2)Let's start with adding a bead to a chain stitch. Hold the majority of the beads behind your left hand away from your working area. Slide up a bead to work with.
3)Push the bead up snug to the prior stitch. You have now brought up the bead and it is in place to work the stitch called for in the pattern, which in this example is a chain stitch.
4)With your hook, reach over the bead to grab the yarn and KEEPING THE BEAD UP SNUG TO THE PRIOR STITCH .....
5)...complete your chain stitch. You will notice that the bead will always appear on the BACK side of your work, not the front.
6)Let's continue by learning to add a bead to a double crochet stitch. Again, keeping the rest of the beads off to the left out of the working area, bring up a bead and push the bead up snug to the prior stitch.
7)With your hook, reach over the bead to grab the yarn and KEEPING THE BEAD UP SNUG TO THE PRIOR STITCH .....
8)... insert your hook from front to back and .....
9)... draw up a loop. Look at the photo closely. You want the bead to be on the back side of the crochet hook. (Note: clicking on the photo will enlarge it)
10) This is an example of what you do NOT want. Look at the photo closely. The bead is in front of the crochet hook. You want it to be at the back, or on the top leaning back, but NOT in front.
11) With the bead at the back, complete the double crochet stitch as normal. You will notice that the bead is again appearing on the BACK side of your work, not the front. Once you've made a few more double crochet stitches ....
11)... flip your work over to see all the beads perfectly incorporated into your project.
Friday, February 25, 2011
How to Make A Magic Ring / Adjustable Ring / Magic Circle Loop in Crochet
One of the questions I get asked most about my patterns is, "How do I make a magic ring?". A magic ring, also known as an adjustable ring or magic circle loop, is a starting technique for crocheting in the round. Instead of "chaining 2 and then putting ___ # of stitches into the second chain from the hook", you create a loop to put the stitches in that can be drawn up tight to leave no, or a barely visible, hole in the center. It is used often in amigurumi patterns and other Japanese crochet patterns. Here's how you do it:
1) Leaving a long tail hanging off to the left, wind the yarn from the yarn ball around your fingers as shown.
2) Grasp the yarn at the top with your forefinger and thumb where the strands overlap. The tail is still the yarn hanging off to the left hand side.
3) With your hook, reach through the ring from front to back and grab the yarn that leads to the yarn ball.
4) Pull up a loop and ....
5) ... chain 1. Think of this chain 1 as a "locking stitch". It is NOT part of your stitch count. It is part of the magic ring.
6) With your hook, reach through the ring again to pull up another loop to make your first single crochet. Continue making as many single crochets as is called for in the pattern. Here I did 8.
7) When you've finished making stitches into the ring, grab the tail and pull gently on it to close the ring.
8) Slip stitch into your first beginning single crochet, NOT the chain 1 "locking stitch". Pull the tail of the yarn again to make the ring tightly closed. Note: Some patterns may have you skip the slip stitch and start your second round by stitching directly into the first stitch of the first round -- either way is valid.
8) Your'e done!!
Subscribe to:
Posts (Atom)


